Sunday, August 31, 2014

Another bookish post

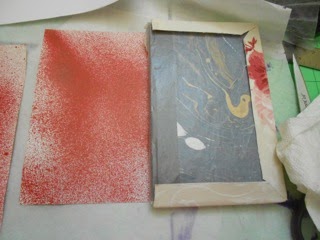
I've been working on books to go into another multi-section (5) slipcase for our TeaBAG challenge.  I wanted to do a pop-up carousel book for a while and wondered if you could tell a story using just 5 pages and 5 books.  First is a photo of the last slipcase with some stamps on it, then construction of a sample (3" X 3") book.

Steampunk stamps on pink

Tool given to me by one of the boys, it came in very handy this week!

Pieces cut and ready for gluing

It took three attempts, but I finally got a sample I liked

I just love the sculptural aspect

Pop-ups to come

Add a slipcover and you have a lovely little accordion book

I recently bought "Playing with Pop-ups: The Art of Dimensional, Moving Paper Designs" by Helen Hiebert and will use ideas from the book.

Also wanted to list a couple of books that had instructions on slipcases.

Hand Bookbinding: A Manual of Instruction by Aldren A. Watson, page 127
Book Art Studio Handbook by Stacie Dolin and Amy Lapidow, page 94 Chapter 5 Enclosures

Friday, August 22, 2014

Ta da!...

This sequence of photos shows gluing up cardstock to each of the bookcloth sections
Cardstock sliped in and glued between book and bookcloth edges

Once dry, fold over cardstock and glue to sandwich the bookcloth

Dry under weight and wax paper

Two of the three sections done
Covers wrapped and finished

Note to self: Next time make sure the sections are square enough to stand on it's own.  This one leans and falls.

View from the bottom, fit is pretty good

Book fits well in sections.  I used a circle punch to make semicircles for extracting book.
Other notes:  I used glimmer mist for decorating cardstock.  It matched the book cloth well, but rubbed off terribly.  I'll need to coat with medium or more paint like decorations to make it able to be handled without turning fingers pink.  You definitely want your books made first to fit the sections to each book.  I also did a google search on slipcases and looked through my books on more instructions.  I'll post a list of references in next post.

Wednesday, August 20, 2014

More progress photos on multi-section slipcase


I wrapped my book in wax paper
Because you need your book in the case for glueing with weights, I wrapped and taped it in wax paper.
 Each side to each case has two glue steps.  Unfortunately, I didn't get good photos as it is difficult to tell what is what.  You slip the cardstock between the book cloth tabs and your book, then glue the tabs (two ends first then long side) on top.  The next step has you fold over the cardstock and glue on top so that the bookcloth tabs are sandwiched between cardstock.  Clear as mud?  They went together pretty well although there was a bit of gap with the book wrapped in the case.  I think if the cardstock were a scoasch (couple of millimeters) taller and wider it would be squarer.  As it is, the first side is flush with the cardstock and the other end had a bit of gap.  The cardstock fold needed a bit of give around the edges of the bookcloth too.
Here is the first section (center one) glued up

This is one of the outside sections with the first part glued (both steps above) to the bookcloth

Tuesday, August 19, 2014

Multi-section Slipcase photos


Marie and I have issued a challenge to the TeaBAG book arts guild to make a multi-section slipcase with five pamphlet books.  The theme is Helen Reddy's song "I am Woman".  I've started a sample three section slipcase for the book in the previous post to work out the bugs and make all the mistakes on.  Here are a couple of photos of the sample in process.

Materials cut

Pieces with book used as pattern
I made bookcloth from a fabric remnant and created a paper pattern to test size for bookcloth strips
(this still ended up a tad short)
One of two jigs (can't figure out what Jig B looks like)
Marked center of bookcloth strip and board to place it in the center
Three bookcloth strips glued with boards and ends turned in and glued.

Saturday, August 16, 2014

Clamshell box finish

The Book Arts Guild project this month was a clamshell box taught by Miss Marie.
This was made to fit the lovely little book taught by Kate Barber


I put it in my bag too soon and it dried a bit wonky
This was so much fun we decided to have a challenge to make a multi-section slipcase.  This should be a good project to build on skills from the clamshell box.